Using Hotwire and Rails to build a live commenting system
24 Jun 2021Today we’re exploring Hotwire, a new-old way of building web applications by sending HTML instead of JSON over the wire.
We’ll learn how Hotwire works with Ruby on Rails by building a simple application that allows users to leave comments on a project and see those comments in real-time, without requiring full page turns.
This guide presents an alternative approach to a guide I wrote last year which guides you through creating a similar experience using Stimulus. Either approach is valid and works well. The approach presented today presents a way of delivering the experience without writing any JavaScript code, and should feel very natural for any Ruby on Rails developer.
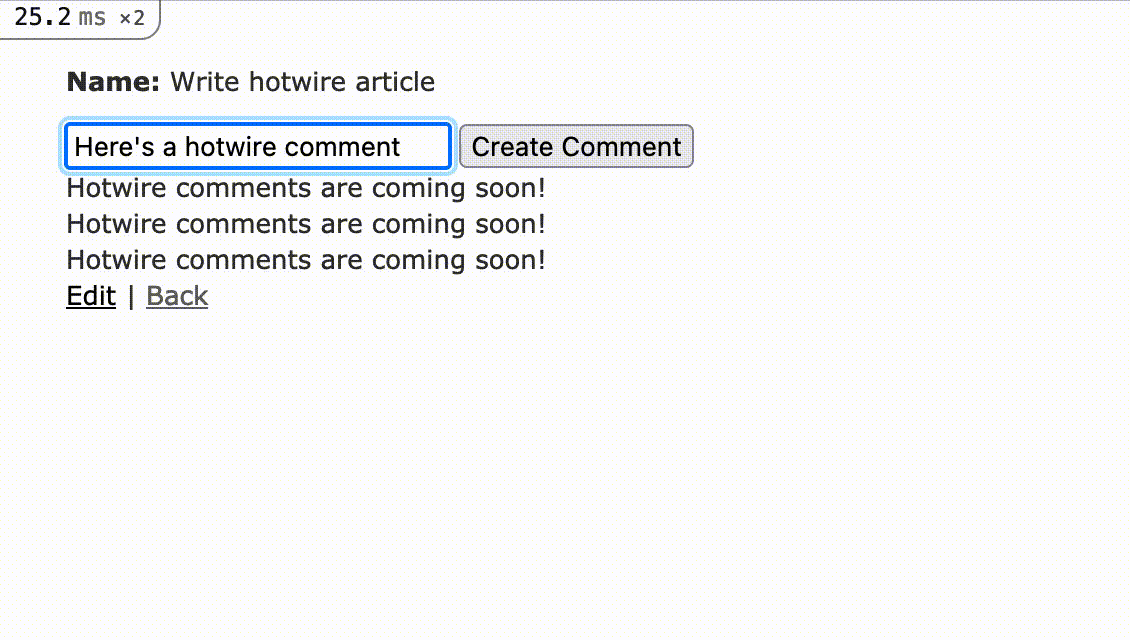
Here is what it will look like when we are finished. It won’t be pretty, but it will work and we won’t write a single line of JavaScript.
To accomplish this, we will start with a new Rails 6.1 application, install Hotwire in the application, and then walk through the basics of adding Hotwire to our views and controllers.
I’m writing this assuming that you are comfortable with the basics of Ruby on Rails development and that you’ve never used Hotwire before.
You can find the complete source code for this tutorial on Github.
Let’s dive in.
Set up our project
To get started we will create a new Rails application and scaffold up a Project resource to build our commenting system against. While you can work from an existing application of your own, you will find this guide easier to follow if you start from scratch along with me.
First, run these console commands to create and setup our Rails app:
rails new hotwire-comments -T
cd hotwire-comments
rails g scaffold Project name:string
rails g model Comment body:text project:references
rails db:migrate
rails s
In your browser, head to http://localhost:3000/projects and create a project. We’ll use this project as we build the commenting system.
Once that’s done, open the application’s code in your favorite editor and add has_many :comments to app/models/project.rb.
Next, display comments on the project show page by updating app/views/projects/show.html.erb with the following:
<!-- app/views/projects/show.html.erb -->

<p id="notice"><%= notice %></p>

<p>
  <strong>Name:</strong>
  <%= @project.name %>
</p>
<div>
  <% @project.comments.each do |comment| %>
    <div>
      <%= comment.body %>
    </div>
  <% end %>
</div>

<%= link_to 'Edit', edit_project_path(@project) %> |
<%= link_to 'Back', projects_path %>
And add a few comments in the rail console:
Project.first.comments << Comment.create(body: "Hotwire comments are coming soon!")
Wonderful.
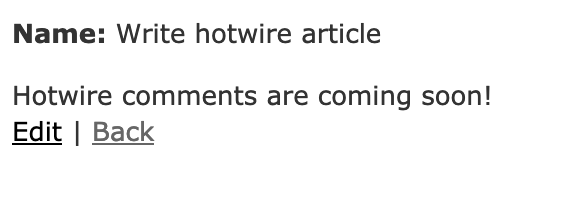
If you’ve followed along successfully so far, when you visit http://localhost:3000/projects/1 you should see something that looks like this:
Now we’re ready to install Hotwire and start learning.
Installing Hotwire
To install Hotwire, first add the hotwire-rails gem to your Gemfile by running this commend in your console or by manually updating your Gemfile and running bundle install in your terminal.
bundle add hotwire-rails
Once the gem is added, run the installer from your terminal:
rails hotwire:install
After the installer runs, restart your rails server or you may encounter some undefined method errors later in this guide.
Now that we have Hotwire installed, let’s start with getting comments to render in real time.
Adding a comments stream
Hotwire as we’re using it relies on frameworks designed and maintained by the Basecamp team. One of those frameworks is Turbo. Turbo is a set of “complimentary techniques for speeding up page changes and form submissions”.
For our purposes, we’ll be interested in two key components of the Turbo package, Turbo Frames and Turbo Streams.
A Turbo Stream delivers page changes to the browser over Websocket. By adding the Hotwire Rails project to our application, we gain access to a set of helper methods that make working with Turbo Streams simple.
Let’s see how this works by updating our project show page as follows.
<!-- app/views/projects/show.html.erb -->

<p id="notice"><%= notice %></p>

<p>
  <strong>Name:</strong>
  <%= @project.name %>
</p>

<%= turbo_stream_from @project, :comments %>
<div id="<%= "#{dom_id(@project)}_comments" %>">
  <%= render @project.comments.order(created_at: :desc) %>
</div>

<%= link_to 'Edit', edit_project_path(@project) %> |
<%= link_to 'Back', projects_path %>
Let’s walk through the changes here one-by-one.
First, we add a turbostream that listens for broadcasts on the comments channel for our Project. This stream is how we subscribe to comment updates for our project. Note that because we’re working with a nested resource here (comments belong to a project), our stream subscribes to comments for just the current project.
We also add an id to the parent div of our comments list. This id is used to identify where to add broadcasted comments to the DOM. If this id is not present or does not match the id in the broadcast, no DOM updates will occur when comment changes are broadcast.
Finally, we’re using a _comment partial to render each comment. That partial doesn’t exist yet, let’s add it now:
mkdir app/views/comments
touch app/views/comments/_comment.html.erb
And then fill in the comment partial with the below content.
<!-- app/views/comments/_comment.html.erb -->

<div id="<%= dom_id(comment) %>">
  <%= comment.body %>
</div>
Note that here, we’re ensuring each comment has a unique id in the DOM, which ensures that new comments are properly inserted into the DOM.
Our last step towards getting our stream setup and comments prepending in real time is to add a callback to the comment model.
When this callback runs, the newly created comment will be broadcast on the project_comments stream that our project#show page is now subscribed to.
  # app/models/comment.rb
include ActionView::RecordIdentifier

after_create_commit { broadcast_prepend_to [project, :comments], target: "#{dom_id(project)}_comments" }
Here we are using the broadcast_prepend_to method provided by turbo-rails. There are a variety of methods that can be used to add, remove, and replace DOM content through callbacks triggered by model changes. The best place to find these methods is by reading the turbo-rails code.
Note that the target value passed to broadcast_prepend_to must exactly match the id set in the DOM earlier.
The dom_id method used to set the broadcast channel target is not normally available in models so we include the relevant ActionView helper class in the model. This simplifies our method of broadcasting to the appropriate channel. H/T to Chris Oliver at GoRails for this helpful trick.
With these changes in place, let’s test out our stream and see how it works.
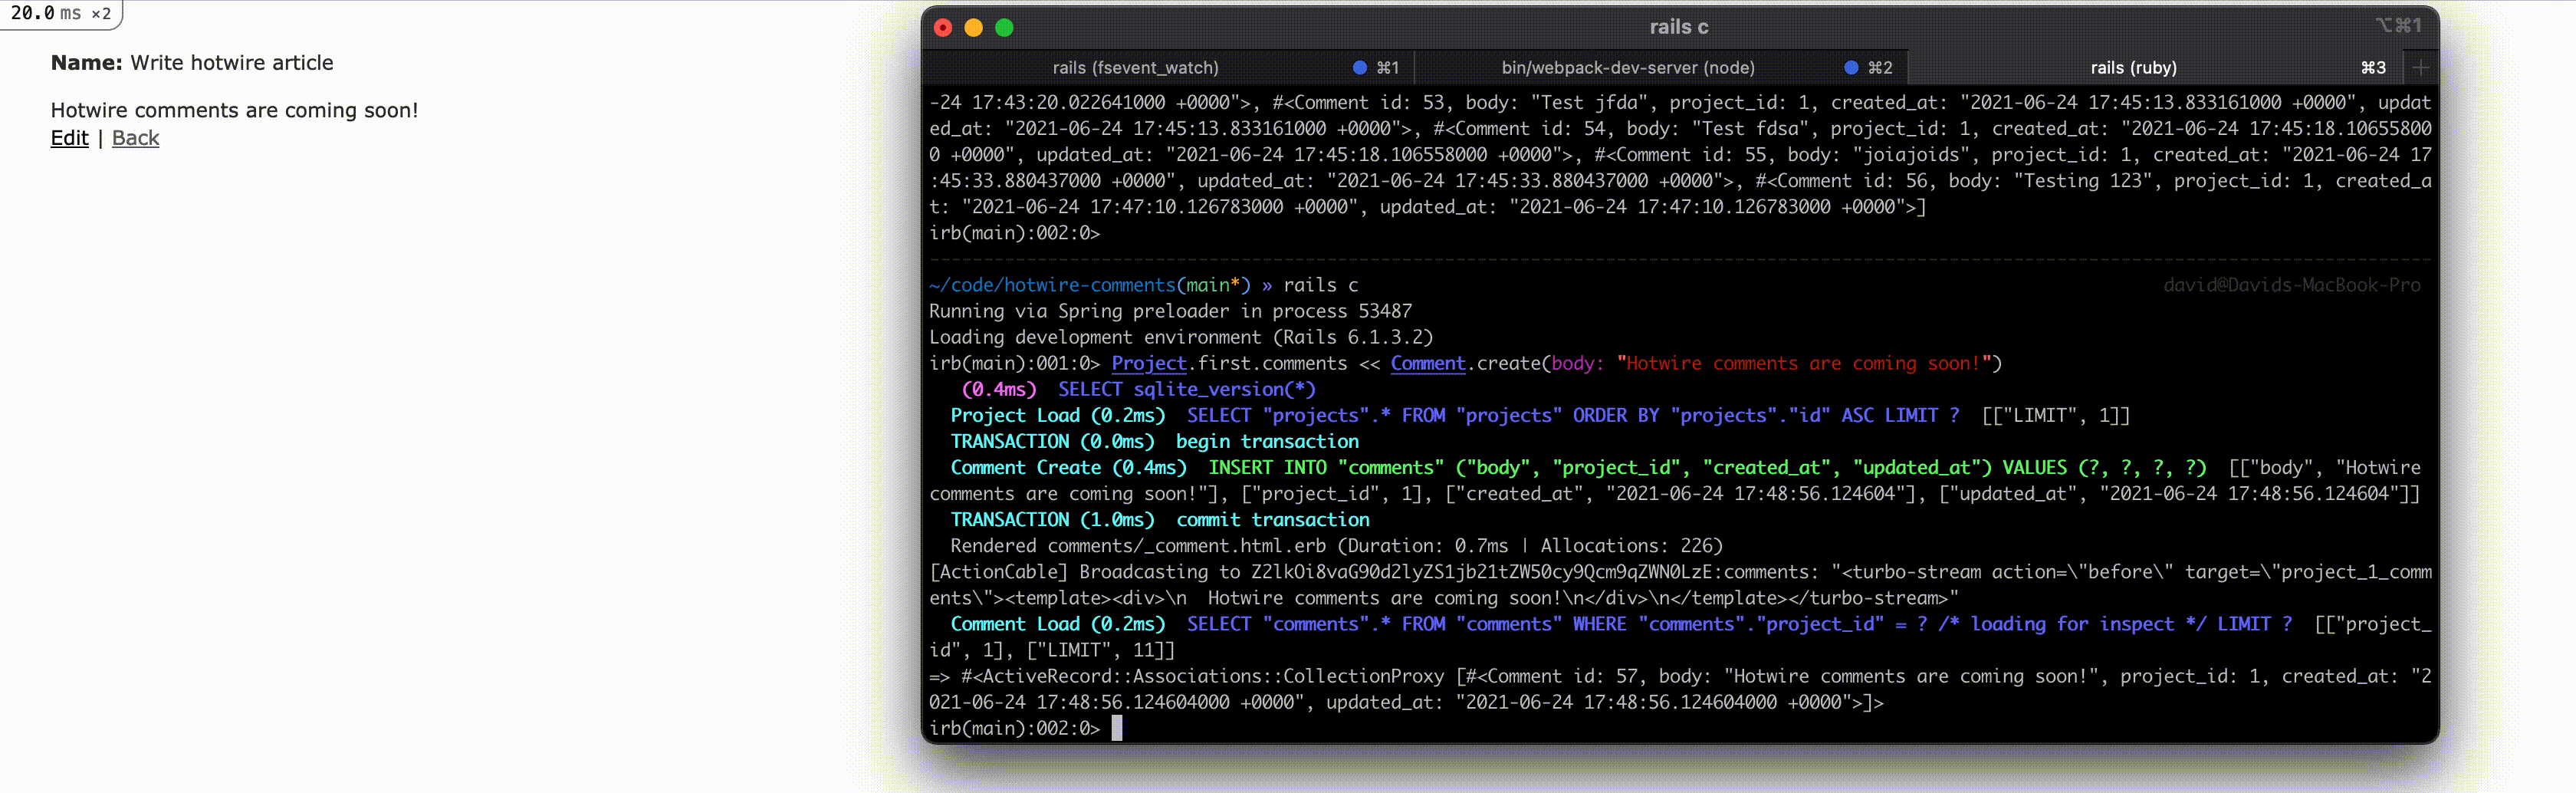
Make sure you’ve got your project open in a web browser, and then open your Rails console and create a comment. If you’ve followed along successfully, immediately after you create the comment in the console, you should see the comment added to the project page open in your browser, like this:
Adding comments with a form
While our subscription is working great, users aren’t going to add content through the Rails console. Let’s finish up this tutorial by adding a form to add comments in the UI without requiring a page turn.
First, let’s create a partial to render our form:
touch app/views/comments/_form.html.erb
And add the below to the form:
<!-- app/views/comments/_form.html.erb -->

<%= turbo_frame_tag "comment_form" do %>
  <%= form_with model: comment, url: project_comments_path(@project) do |form| %>
    <% if comment.errors.any? %>
      <div id="error_explanation">
        <h2><%= pluralize(comment.errors.count, "error") %> prohibited this comment from being saved:</h2>

        <ul>
          <% comment.errors.each do |error| %>
            <li><%= error.full_message %></li>
          <% end %>
        </ul>
      </div>
    <% end %>
    <%= form.text_field :body %>
    <%= form.submit %>
  <% end %>
<% end %>
This is pretty close to a standard Rails form partial, with the added turbo_frame_tag that wraps the entire <form> element.
This frame_tag allows us to selectively replace the content of the form partial on form submission without writing any special Javascript.
Now we’ll need a controller to handle submissions from this form.
rails g controller Comments
Fill in the controller with the below content:
# app/controllers/comments_controller.rb

class CommentsController < ApplicationController
  def create
    @project = Project.find(params[:project_id])
    @comment = @project.comments.new(comment_params)

    respond_to do |format|
      if @comment.save
        format.turbo_stream { render turbo_stream: turbo_stream.replace('comment_form', partial: 'comments/form', locals: { comment: Comment.new }) }
        format.html { render partial: 'comments/form', locals: { comment: Comment.new }}
      else
        format.turbo_stream { render turbo_stream: turbo_stream.replace('comment_form', partial: 'comments/form', locals: { comment: @comment }) }
        format.html { render partial: 'comments/form', locals: { comment: @comment }}
      end
    end
  end

  private

  def comment_params
    params.require(:comment).permit(:body)
  end
end
Our comments controller create method is a fairly standard Rails controller with one twist: the create method responds to turbo_stream requests. When a turbo_stream request is sent to this endpoint, the controller responds with a turbo_stream response to replace the comment_form DOM element with the comments/form partial, both on a successful request and a failed request. Note that, as before, the “comment_form” id in our turbo_frame needs to match the target passed to the turbo_stream.replace method.
The only difference between the failure and success responses is using the existing @comment on failed responses so that errors can be rendered. On success, we set the comment local variable for the form partial to a new comment to clear out the body field on the form.
To test out the error path, you can update your Comment model to validate the presence of the body field.
Next, before we can create comments, we need to add the appropriate route to the routes.rb file:
# config/routes.rb

Rails.application.routes.draw do
  resources :projects do
    resources :comments, only: %i[create]
  end
end
Finally, let’s display the comment form on the project show page:
<!-- app/views/projects/show.html.erb -->
<p id="notice"><%= notice %></p>

<p>
  <strong>Name:</strong>
  <%= @project.name %>
</p>

<%= render partial: "comments/form", locals: { comment: Comment.new } %>
<%= turbo_stream_from @project, :comments %>
<div id="<%= "#{dom_id(@project)}_comments" %>">
  <%= render @project.comments.order(created_at: :desc) %>
</div>

<%= link_to 'Edit', edit_project_path(@project) %> |
<%= link_to 'Back', projects_path %>
Refresh your project page after you update the view.
If everything is set up correctly, you should see new comments added without a page turn. If you submit with the comment body left blank, you should see error messages added to the page.
Wrapping up
Combining Hotwire and Rails, with a sprinkling of Stimulus for client-side interactivity is a powerful way to build performant, scalable, developer-and-user friendly web applications.
While single page applications and independent frontends built with the latest JavaScript framework have their place, if you’re a small team building standard SaaS applications, I encourage you to spend time learning about Hotwire-powered applications to keep your team productive and focused on solving problems for your users, not fighting with your tech stack.
Helpful Hotwire resources:
- Hotwire intro video
- Turbo handbook
- Stimulus handbook
- GoRails Hotwire introduction
- turbo-rails source
Thanks for reading! As always, get in touch if you have any questions or if I can be of any help.